I have come to realize, the hard way in fact, that I am more likely to complete any given task or project in a given frame of mind, if I were held accountable for it! I am sure many of us are the same way. Its not that I lack self motivation or the tenacity to stick to something and see it through completion. But I do let things slide if I perceive other tasks or items with a higher priority (for e.g. kids, their activities, their health, you get the idea.. )
To make a long story short, I came across the Baking Eggless group when I was going through some blogs and I thought it was an immensely interesting idea and a relevant one since any and all baking that I do is eggless ! So I joined the group and here is my first challenge - completed (by mere hours to spare , but completed nonetheless , whew ! )
The challenge this month was to make Tiramisu, the Italian pick me up :) , completely from scratch and eggless to boot. I had made Tiramisu before, but had used store bought savioardi and mascarpone cheese. The second time around, I stuck to the basic recipe and kept it simple.

The mascarpone cheese was pretty easy to make and I was totally surprised by the result. I followed the recipe faithfully and the cheese turned out really well.
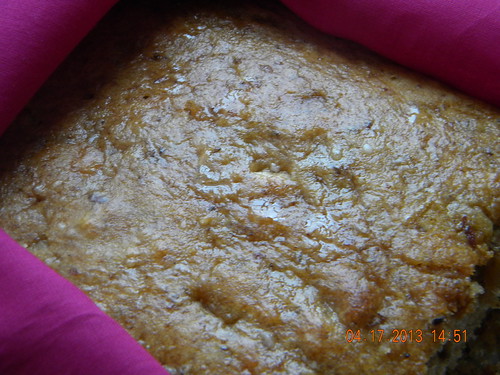
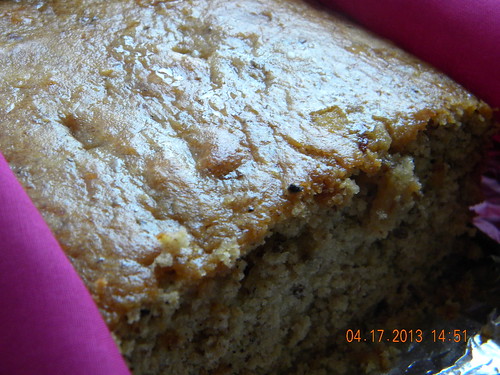
Now the all-important lady finger cookies or the savioardi cookies were a different matter altogether...My first attempt turned out pretty badly..the cookies were totally flat and chewy and unusable for a Tiramisu..They weren't inedible, thankfully..I would have hated to see them go to waste !
Then I decided to follow the eggless recipe that most of my fellow baking enthusiasts seemed to have success with and was pretty satisfied with the results...I halved the recipe because I was afraid of not getting the proper results and then seeing them go waste.They were still not as fluffy and light and perfectly shaped as the original version, but I wasn't complaining !

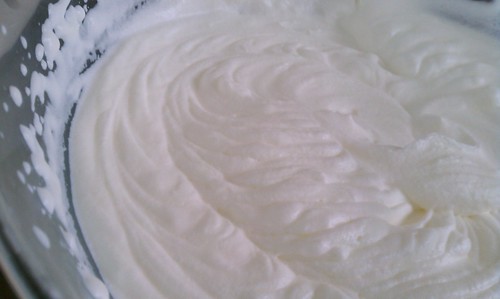
The next step was to make the whipped cream, which was as simple as taking cold heavy cream in a preferably chilled bowl and whipping it with preferably chilled beaters until soft peaks form . I added a little bit of sugar to the cream halfway through the whipping. This helps in getting to the soft peak stage.
Ingredients:
1 C heavy whipping cream
2 tsp granulated sugar
Method:
Pour the cream into a bowl and using a hand held mixer, whip the cream for at least 3 minutes. Slowly add the sugar and continue whipping until soft peaks form, at least another minute or so.
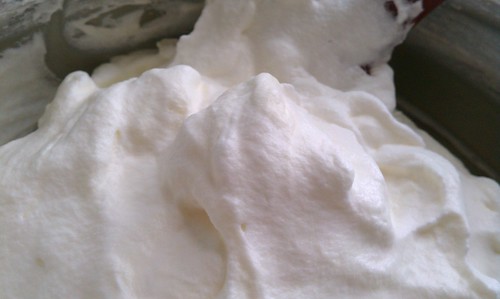
The mascarpone cheese is mixed thoroughly with sugar. The whipped cream is then gently folded into the cheese in parts, so that the aeration is not lost. This helps in in keeping the final mixture creamy and light.
Last but not the least - the assembling:
I used a 9 X 5 loaf pan, you can use any kind of container, square or round. You might have to cut your cookies to size. Line the container with cling wrap so that its easy to unmould and cut before serving.
Method:
1. Dip the cookies quickly in cooled coffee and place them in a single layer in your container of choice. You can make the coffee to your preferred strength.
2. Using half of the whipped cream - mascarpone mixture, layer it onto the cookies using a flat spoon or a spatula. Cover all the cookies evenly and get the mixture into the corners of the container.
3. Place another layer of coffee dipped cookies onto the layer of cream.
4. Use up the remaining of the cream - cheese mixture to top off the cookies.
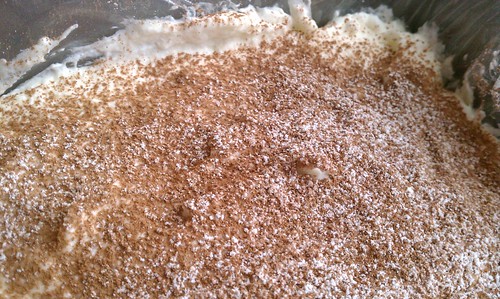
5. Sprinkle unsweetened cocoa over the top , cover with foil or cling wrap and refrigerate overnight before unmoulding and serving and devouring :)
Notes:
1. The eggless lady finger biscuits will probably not come close to the version with the eggs. They will be delicious and useful in a Tiramisu, but they probably wont be as fluffy and light as the original ones.
2. You can use as many or as less of the cookies as you want. It depends on the size of the container you use.
3. Refrigerating the assembled Tiramisu is highly recommended, because it will help the cookies absorb the liquids and will help the flavors merge.
4. Although there are several components to this recipe and it is definitely a time consuming recipe, it is definitely a must try!
5. We ate the Tiramisu after refrigerating it for 24 hrs. It was really good. Although, I think I should have dipped the cookies a little bit longer in the coffee. I was unsure of whether it would hold up to a longer dipping. The cookies didn't soften all that much, but since they were no delicious as well, it didn't really matter in the end !
To make a long story short, I came across the Baking Eggless group when I was going through some blogs and I thought it was an immensely interesting idea and a relevant one since any and all baking that I do is eggless ! So I joined the group and here is my first challenge - completed (by mere hours to spare , but completed nonetheless , whew ! )
The challenge this month was to make Tiramisu, the Italian pick me up :) , completely from scratch and eggless to boot. I had made Tiramisu before, but had used store bought savioardi and mascarpone cheese. The second time around, I stuck to the basic recipe and kept it simple.

The mascarpone cheese was pretty easy to make and I was totally surprised by the result. I followed the recipe faithfully and the cheese turned out really well.
Now the all-important lady finger cookies or the savioardi cookies were a different matter altogether...My first attempt turned out pretty badly..the cookies were totally flat and chewy and unusable for a Tiramisu..They weren't inedible, thankfully..I would have hated to see them go to waste !
Then I decided to follow the eggless recipe that most of my fellow baking enthusiasts seemed to have success with and was pretty satisfied with the results...I halved the recipe because I was afraid of not getting the proper results and then seeing them go waste.They were still not as fluffy and light and perfectly shaped as the original version, but I wasn't complaining !

The next step was to make the whipped cream, which was as simple as taking cold heavy cream in a preferably chilled bowl and whipping it with preferably chilled beaters until soft peaks form . I added a little bit of sugar to the cream halfway through the whipping. This helps in getting to the soft peak stage.

Ingredients:
1 C heavy whipping cream
2 tsp granulated sugar
Method:
Pour the cream into a bowl and using a hand held mixer, whip the cream for at least 3 minutes. Slowly add the sugar and continue whipping until soft peaks form, at least another minute or so.
The mascarpone cheese is mixed thoroughly with sugar. The whipped cream is then gently folded into the cheese in parts, so that the aeration is not lost. This helps in in keeping the final mixture creamy and light.

Last but not the least - the assembling:
I used a 9 X 5 loaf pan, you can use any kind of container, square or round. You might have to cut your cookies to size. Line the container with cling wrap so that its easy to unmould and cut before serving.
Method:
1. Dip the cookies quickly in cooled coffee and place them in a single layer in your container of choice. You can make the coffee to your preferred strength.
2. Using half of the whipped cream - mascarpone mixture, layer it onto the cookies using a flat spoon or a spatula. Cover all the cookies evenly and get the mixture into the corners of the container.
3. Place another layer of coffee dipped cookies onto the layer of cream.
4. Use up the remaining of the cream - cheese mixture to top off the cookies.
5. Sprinkle unsweetened cocoa over the top , cover with foil or cling wrap and refrigerate overnight before unmoulding and serving and devouring :)

Notes:
1. The eggless lady finger biscuits will probably not come close to the version with the eggs. They will be delicious and useful in a Tiramisu, but they probably wont be as fluffy and light as the original ones.
2. You can use as many or as less of the cookies as you want. It depends on the size of the container you use.
3. Refrigerating the assembled Tiramisu is highly recommended, because it will help the cookies absorb the liquids and will help the flavors merge.
4. Although there are several components to this recipe and it is definitely a time consuming recipe, it is definitely a must try!
5. We ate the Tiramisu after refrigerating it for 24 hrs. It was really good. Although, I think I should have dipped the cookies a little bit longer in the coffee. I was unsure of whether it would hold up to a longer dipping. The cookies didn't soften all that much, but since they were no delicious as well, it didn't really matter in the end !
